Visitors

Sunday, February 27, 2011

February Favorites

Starting from now by the end of each month I will be posting my monthly favorites: products that I cant get enough of and sometimes I will throw in one or 2 products that didn't work out for me.
Lets start with Skin Care:

February's weather really had me going nuts, my skin never ever felt that dry before. AND because of all the weather changes my skin was really unstable & really broke me out. So this month I have a little bit more skin care product than ever before.

-My Conair Facial Steamer: This little machine is like a must have for all female and male. It really opens up your pores for better cleaning, you can feel the difference to your face after using it. (London Drug, Superstore, Walmart)
-Vichy Calming Cleansing Solution (for Face & Eyes): This really gets rid of any extra makeup that I may have left with just a makeup removing wipe. It really save my skin from breaking out & now I wont go anywhere without this bottle. (Shopper Drug Mart)
-Neutrogena Intensified Day Moisture (SPF 15): This little jar of cream made a huge difference to my dryness. Transform my dry skin to instant moisturize soft and smooth skin. A bonus to this is the spf I am not a big fan of wearing actual sunscreen in the winter. So I look for any products that contains any sort of SPF and this have just the perfect amount for winter. (Walmart)
-Laneige Strawberry Yogurt Peel: Since the weather really took a toll on my skin, I been getting acne scaring. This peel helped my scaring fade faster, is not going to be like magic gone instantly. It is going to take time and along with other products to fade it. But I can see that this peel did help for a faster recovery. (Soon to be found on my online store)
-My Beauty Diary Mask (Aloe & Pearl Powder Mask) The aloe mask helped with soothing my dry skin, the pearl powder mask helped with whitening and fading my acne scaring. (Soon to be on my online store, T&T)
-Clearasil Stayclear Acne Treatment Cream BP Plus: This I was really hesitant to put it on my monthly favorite, because it was really a love hate relationship. I love it because it really clear out my acne because of the Benzoyl Peroxide and also because of the BP it really dried out my skin even more. (Walmart, Superstore "sometimes")

Makeup: Although I have been trying out a few new products this month none of it made it into my favorite because of the lack of time.
-Sonia Kashuk Hidden Agenda Concealer Palette: Great coverage for covering up most of my acne scaring but i still had to use another concealer for finishing touches. (Target, Ebay. This item is exclusive to US Target)
-Maybelline Mineral Power liquid Concealer: This is the perfect touch up for my blemishes and dark circles. (Any drugstore)
-Maybelline Shine Free Loose Powder in Light: Great additional coverage, really held my oils together. Blotting less for me=Less work=I am Happy:) (Target this item is exclusive to US. However you could get the shine free press powder here in CAD)
-Sigma SS209 Eyeliner Brush: I love to use this brush for a define thin line, which is great for natural look.

Thats it for my Feb favorites, tons of skin care products cause I mainly focused on my skin this month. I would like to know what your favorite of the month is: tell me on my facebook page http://www.facebook.com/pages/Lets-Glam-UP/183783444995398
Youtube account: http://www.youtube.com/user/LetsGlamUP (more videos will be uploaded soon)
Cheri
xoxo

Tuesday, February 22, 2011

Review: Maybelline Fit Me foundation

Sorry I have been totally MIA for a week...I was so caught up in a lot of different things that popped up during the week, that I had no time to write. Quick shout out to Michelle my good friend that just came back: WELCOME BACK hope you are having fun in our cold cold weather. But anyhow I wanted to do a review for a product thats currently being talked about all the time. That is the Fit Me foundation from Maybelline, I am a big fan of drugstore foundation. Don't get me wrong I love my department store foundation, but as an everyday foundation user the price just adds up over time. Drugstore foundation or I should say drugstore make up has improve their quality over the years. Some drugstore products are even extremely similar to department store ones, is unbelievable how things change over the years.

Fresh & Flawless is the whole concept of the FIT ME line from Maybelline. The foundation should give you a natural finish still letting your natural skin glow. The color of the foundation should blend seamlessly into your natural skin tone. By picking out the same shade numbering to other products, you will find the right color to go along with your shade. Products offered in the Fit ME Line includes: Foundation, Concealer, Press Powder, Bronzer & Blush. I picked up 2 things from this line the foundation and the press powder in 120.

When I rate a foundation I like to base it on a few factors: Experience with shade selection, Texture, Coverage, Lasting Power, Packaging & Price range.

Usually my experience with shade selection for drugstore foundation is a mess, I hate it because there's always no testers. That just sucks cause in order to know your exact shade. You always need to test it out on the side of your face and blend it in. Therefore you really have to know your undertone and shades that will work for you. Although there wasn't a tester with this line, there was a plastic sheet that had the coloring of the foundation on it. Which was helpful in some shape or form since you could sorta match it with your hand. I have to say that my experience with the shade selection in this line went pretty smooth. I was able to pick out the right shade for my skin at the first time and I never ever done that before. Especially with Maybelline Foundation, since I find that they have way too much orange tone to their foundation. I always had to repurchase or figure out another way to make it work for me. Another thing that also helped was having the different foundation separated into different shade category: Light, Medium & Dark. There was a decent amount of shades to pick from in each category: around 5-6 different shades. So I do think that it will be a bit easier for everyone to find a shade that matches them.

Every foundation always claims to do something or to feel a certain way. We always want to know if it stays true to what it claims. This foundation claims to be silky and blends seamlessly to your skin, feeling light letting your skin breath. The question is did it do all that; and the answer is YES. OMG YES IT DID....for the first time again it stay true to what it claims. It felt so smooth and light on my face no matter how many layers I applied. (I applied 3 layers for extra coverage) It definitely blended seamlessly, I could barely see any streak marks. (I did blend it with my fingers which was the way it was suggested) So I Give it a THUMBS UP for the texture.

Since the foundation was marketed to feel very light on the skin, so it could breath. There wasn't much coverage, I have to say this is a light to a build able medium coverage foundation. This is definitely not for someone that needs a lot of coverage to even out major discoloration or scaring. I have very little discoloration but I do have acne scaring which is fading slowly. However I did used 3 layers of foundation to get a decent amount of coverage on my scaring, is definitely lighter to what I am use to wearing.

I have heard a lot of reviews saying that the foundation got really oily within 1-2 hours. I actually filmed myself to test out how long the foundation would last, I was actually expecting the worst but it surprised me. It lasted for 7 hours until I saw visible creasing. I will insert the video link down below for more information and to see the transformation from start to end.

Packaging is to heart to great sales, good packaging will suck you in. This is one of those drugstore packaging that looks very classy and high end. With the glass tube and simple design on the bottle it looks to be expensive. The only down fall to the foundation packaging is that theres no pump. I always don't get why companies design a foundation bottle without a pump. You waste product by pouring out too much with a pump you have more control to your product.

Price point for this foundation was around $8CAD, is in the typical drugstore foundation price range. Originally I thought the Foundation would retail at a higher price point like $12CAD. So I was pretty surprise that both the foundation and the powder was $8CAD.

Would I buy it again? Yes, but I would probably buy it again when my skin gets more clear.
Would I recommend this to a friend? Yes only if they have clear skin or with minor imperfection and want something light.
How many cherries would you give for this foundation? 4/5 Cherries (the pump issue for 1 point, .5 for coverage & .5 for lasting power)

Vote on the poll on the top right hand corner of my blog for what you would like to see next.
Also please "like" my Facebook Page you can click the Facebook badger on the left hand corner of my blog.
For the Video: http://www.youtube.com/watch?v=ODhoGT7uIt4 (subscribe) i will be making a lot more videos from now on
Cheri
xoxo

Thursday, February 17, 2011

Open Box Review: NYX Ultimate Beauty Box

My HauteLook Order finally came in, if you recall two weeks ago I did a blog post of the HauteLook Sales event for NYX. Well I took advantage of the sales and got a little something for myself: The NYX Beauty To Go Ultimate Beauty Box. Shipping was faster than I expected, since it was estimated it would come on the 25th. I was sorta expecting a WOW from this palette since the pictures looks absolutely amazing. However when I opened the palette, I got a mix feeling for this product. Not that it wasn't nice or anything, I just expected a little bit more. There's some things I don't like about this box is more of a design issue rather than the product quality.
Packaging:
The box is pretty big and heavy itself it feels sturdy and quite compact for how much is offering inside. However I am just not a big fan of the finishing of the box, it has this glossy finish which is really easy to scratch. I am just one of those girls that like to keep my palettes looking new and clean. With that glossy finish it just isn't helping, the box already have a few scratches and I just got it for a day.
Shadow Placement:
I wish that NYX could have gone with a color placement system, either by color to shade or by colors that work with different colors. It was weird to see that most of the shadow placement were scatter everywhere. This makes it very difficult for beginners, who doesn't have the color matching experience.
Quality:
I expected good color pay off and high pigmentation from NYX, since they are known for their affordable price with great quality. I am glad that they kept that quality in this palette, since the tin size is quite small you wont need to use as much product.
Variety of Color:
You get a decent amount of color variation, I have to say that you are looking mostly at neutral tones colors rather than bright in your face ones. Formula wise this palette is mostly shimmer, few satin finish and only 1 matte finish. I am glad most of these are shimmer formula, cause I love shimmer but by how the palette is marketed I would guess that it would have more different finishes.

Was this Palette a disappointment to me at fist impression? NO, although there's quite a few things I didn't like about it. But they still kept the quality of the product which is the most important to me.

I would give it 4 out of 5 Cherries at this point.I would need to use this palette more to give a full review and to know how practical this palette is at the end of the day.

UPDATE: For a full Review of this Palette Click here:

Pictures of the Swatches is posted on my Lets Glam Up Facebook Page:

Cheri
xoxo

Saturday, February 12, 2011

Soft & Sweet Valentine Day Nail Tutorial

Ladies are you ready for Valentine's Day yet? You got your make up, hair style and clothes set for your date but still feels there's something missing. Maybe is your nails why don't we turn our boring nails to make it look sweet and cute. Since is Valentine's Day I am sticking with soft pastel color & pinks, to add a little twist I also used a sparkle nail polish.

These are the product I used to achieve these nails; Kiss nail filer, Sally Hansen-Hard as Nail polish "Sheer French Color", Wet n Wild nail color in Sparked & SaSa-Pinkey Pure Nail polish in Clear (as my top coat).

Pull out all your equipments and lets get started:

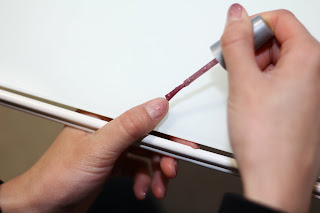
Step 1: If you have long nails this is the time to file your nails to your desire shape & length. After take a soft pink preferably with a hint of nude nail color. I am using Sally Hansen-Sheer French Nail Color, is a creamy peach color with a hint of pink. Apply a sheer coat of this color starting from the middle, so the product will concentrate there, than apply it to the side. (Tip: when apply the color rotate your finger to where the color needs to be place, instead of moving the brush for a quick application) Depending on how sheer the nail color is and how opaque you want the color to be, go ahead and apply a second coat if needed. (I did do two coats with the Sally Hansen nail color since is pretty sheer)

Step 2: After letting your basic color dry, it took about 10-15 mins for mine to dry. Is time to add some sparkle on to your nails, here I am doing a gradient affect to my nails with the sparkles polish. Taking my Wet n Wild Nail Color in Sparked(a glitter pink and silver nail color) wipe off as much of the product off the brush on the tip of the bottle. Apply the color starting from midway of the nail we want a sheer wash of the sparkle.

Step 3: Than grabbing a bit more nail polish and concentrate the sparkle on the tip of your nails now. The sparkle should look very light from the mid point and gets brighter moving up towards the tip of your nail. Let that dry completely before moving on to the next step.
Step 4: After 10 mins later the sparkle should have dried, take your favorite Top coat and apply that over your nails. Since we are working with sparkles I suggest applying a minimum of 2 layers of top coat. We don't want our nails chipping off during dinner with your date.(Tip: if you wish to keep your nail color longer, apply a top coat every single day to seal the color in)

You now got pink pretty nails thats soft and sweet with a pink & silver sparkles for a little fun. Hope you enjoy this tutorial and I will be back with more tutorials for you all. Happy Valentine's Day to everyone again and have a good one.

Cheri
xoxo

Thursday, February 10, 2011

Deal of The Day "Smashbox"


Smashbox lovers you are in luck, the Iconic Palette is back in stock and is now for $12.60 CAD! YES you heard me right only $12.60 for a $46 value product, this offer is only available online at Sephora. So don't go running to the store to pick this up cause you wont be able to find it. The Palette contains 4 pigmented eyeshadow in a brown, shell, peach and light blue color with a mirror in the compact. These colors are neutral enough for a day to day use. Fan of Smashbox or not take advantage of this opportunity because this type of deal wont happen much. If you never tried Smashbox and want to get into the brand this is a great way to start.

Wednesday, February 9, 2011

Valentine Day Makeup "Bold & Strong"

Don't have a date for Valentine doesn't matter you can still rock this look. This isn't your typical soft and romantic look, colors I am using is a bit brighter and wilder. If you want you can opt for a softer matte color to tone the look down. I am using the Coastal Scent 88 Shimmer Palette, you can use whatever you have. I am using a few main colors in this palette; Hot Pink, Light Purple, Muted Purple and Pale Yellow.


Step 1:
Prime your lids with a eyeshadow primer, I am using Urban Decay Eyeshadow Primer
Potion. Take a pale yellow shadow or you can use a champagne or white and pad that along your lids. Concentrate the color on your lids and take it a bit up beyond your crease, you can also apply that on to the brow bone. Make sure you blend out the harsh line before moving on to the next step.

Step 2:
Take a hot pink shadow, if you don't have a hot pink use a softer pink this is just for a gradient effect. Now have the color concentrate on the outer corner and fade it
into the middle. You want the least color in the middle and don't over do the pink because it can make you look like you didn't get any sleep. Blend it out lightly you don't want the pink to spread too much.

Step 3:
Take a light purple and place it on 1/3 of the lid, again you want to go from darkest to lightest. This step is to build up a gradient so don't cover too much of the pink cause we still want that showing. Now is time to add some depth I chose a muted purple over a black because these colors are so bright, adding a black would mud out the whole look. So use a pencil brush and concentrate the color on the outer corner and lightly blend it up the crease and into the 1/3 of the lid. Remember the trick to this look is the blending, you want a gradient effect. So you should have colors overlapping, but not totally covered so fading the color is important.

Step 4:
Line your upper lash line and tight line with your favorite liner, I am using the Revlon Color Stay Eyeliner in Black. Tight lining your eyes is also known as invisible eyeliner, there is a tiny part of skin that sits right between your upper lash line and you eye balls. Lift up your lids a bit and run your eyeliner on that area, that is call tight lining and it will make your lashes look a lot fuller. Make sure to only use a pencil or kohal eyeliner on the tight line.

Step 5:
Curl your lashes and apply a coat of your favorite Mascara, I am using the Maybelline Falsies Volume Express Mascara in Blackest Black. Than you are all done with your eyes, just add a hint of blush on your cheeks and lip color than your are set for V day.

Hope all of you will have fun on v day and spend it with the people you love and care. I wish you all a Happy Valentine's Day.
I know this look is a bit bold for v day, I was actually going to save this look for the spring inspire look. However I am currently sick and don't have the energy to create a look to have pictures taken. So I was not sure if I was able to get a V day look in time, therefore I had to put this up for now if I get better by Friday I will do a more romantic one and get it up on Sat.

Also make sure to check my facebook page out for request, questions and answer.
Cheri
xoxo

Tuesday, February 8, 2011

Review: Sigma Brushes "The Complete Kit with Brush Roll"

Time for another product review, lets see who is on for judgement today: Sigma Brushes. Well to be more specific is the Complete Kit with Brush Roll, since they are they only brushes I have from Sigma. Is hard to rate brushes because is base on what each person likes & how the brushes work for them. I may not like a particular brush because of it size but someone may appreciate it. Therefore I can only rate it under Quality and Value but not Practicality.

My Rating: 4.5 out of 5 cherries

Quality:
-You are getting great quality from Sigma there is no doubt about it. Their brushes are soft and not scratchy. There may be one or two brushes that sheds when you wash it but is not terrible. The handle of the brush is thick and sturdy which you will have a nice grip to. Also no matter how many times you wash your brush it still feel soft and not scratchy or rough.

Value:
- Are you getting a bang for your buck? I have to say yes although this kit isn't dirt cheap, but the price range is reasonable for what you are getting. This kit cost $99 CAD w/out shipping, you may look at that price and say is hell expensive but think again. You are getting 12 different brushes with a good range from face to eyes, plus you get a brush roll and the quality is as comparable to MAC. If you look at MAC brushes 1 face brush can cause you from $38 CAD to $62 CAD. You get 5 different face brushes from Sigma, lets transfer that to MAC Brushes. With 5 face brushes you will be paying $190 CAD and thats only if all 5 of them are worth $38. Thats a lot of money there and you are only getting 5 brushes for $190 but with Sigma you are getting 12 brushes for $99. See the big difference and you are probably going at the whole "what about the shipping and tax?" Say it all comes to a max of $20 you are still only paying $119. Thats a difference of $300 you can use that for something else clothes, text book, fancy dinner whatever it may be.
-Plus your brushes will have a longer life span than your other brushes. Since Sigma brushes are hand made to perfection running under high standards. Which means you wont have to spend so much on brushes over the next couple of years, trying to replace brushes that are deform in less than a year.

The only down fall to this kit is that some brushes have this weird smell to it but after a few washes is good. So that was the only thing I didn't like so much cause it made the other brushes smell bad.

Would I buy this set of brushes again?
Yes, this set of brushes are your basic and I would repurchase you cant go wrong with more basic brushes.
Would I recommend this kit to the general public?

Depends because not everyone would want a full kit. Some may only like to do face makeup and don't need eye brushes so you may not need to purchase a whole kit. Now there are just face or eyes kit if you only do one specific area available.

Would I recommend this to starters?
Yes/No. Yes for those starters that have a bit of experience and are looking to expand than definitely yes. No to those that are just starting and experimenting with makeup and are on a tight budget. What I would suggest to those is the Sigma Travel kit (not the Premium), that way you are getting a bit of everything for a cheaper price and the quality is the exact same but keep in mind is not full size brushes.

Cheri
xoxo


Monday, February 7, 2011

Brushes 101 "Care for Brushes"

Do you treat your brushes right? They need as much caring as pets do. No matter where you get your brushes, expensive or not you need to take good care of your brushes because they are your friend. The better care you give your brushes the longer you can use it, so you don't have to constantly replace it. Believe me you will save a lot of money and maybe spend it on something you like. Now with quality brushes you can probably keep it longer than others, so I definitely prefer and suggest investing in quality brushes. Drug store brushes are just as good but with the quality you may not be able to keep it as long. Now it all depends on you, on how clean and new you want your brush to be. It all starts with taking good care of your brushes.
Taking good care of your brushes include a few factors: Cleaning & Drying.

Cleaning is the first step to taking good care of your brushes and your skin too. Dust and bacteria can form on your brushes through time, and it will be transfer onto your face causing breakouts and much more. Here's a rule of thumb on cleaning your brushes.
-Deep Clean your brushes at least once per week. This means washing it at the sink with a baby shampoo. You want to wash your brushes with a gentle shampoo so don't use your regular shampoo. Wet your brush first and take a bit of shampoo and work your brush on one side/one direction first. Do not sweep back and forth/ flipping side because this can be too harsh on the bristles. This can cause the bristles to be loosen at the ferrel.
-Spot Clean your dirty brushes every day to get rid of any product so bacteria doesn't form. Also the color or product wont transfer on to your face or other product. Spot clean with a brush cleanser you can purchase these at Sephora, any department store, drug store and you can even make your own.

You may see that drying a brush is not a big deal just put it out there and let it air dry. Well you are wrong if you dry your brush the wrong way,it can shorten the life of your brush.
-Never try to scrub dry your brush cause that is never good
-You want to place your brush to dry against something a wall, a book anything to get it to stand up straight. You want the bristles of your brush facing towards the floor and the barrel up the ceiling. This way the excess water wont run down the ferrel and loosen the glue that binds the bristles.
-If you are afraid of your brush loosing shape after stand on the bristles all night. You can wrap the bristles with tissue to keep its shape while it air dry, or you can purchase brush guards instead of using tissue.

So that is how I take care of my brushes, if you do this right you can actually keep your brushes for 5 years. Which than is time to switch your brushes out and replace it with new ones.

Sunday, February 6, 2011

Brushes 101-Part 2 "Eye Brushes"

This is the 2nd part to Brushes 101 if you haven't yet checked out my part 1 here is the link http://letsglamup.blogspot.com/2011/02/brushes-101-part-1-face-brushes.html

So lets get started with the eye brushes, there is a total of 7 eye brushes and you can purchase just the eye set from Sigma.

E40-Taper Blending Brush:
This brush is made with natural hair and is slightly tapered to a dome shape. This brush is fluffy which is great for highlight on the brow bone. You can also use this brush to blend out any harsh line on the crease. I personally don't like to use it for the purpose of blending because the brush is too big. I don't suggest using this brush to blend for those that do not have a large lid space to work with. Which can blend away too much of the color, I like to use this brush for setting powder underneath my eyes.

E55-Eye Shading Brush:
This brush is a must have in your collection because this brush can pack on any type of shadow and give you a full concentration of color. This brush is especially good with loose pigment or any shadows that may cause a lot of fall out. This brush can also use to blend out any harsh line too but be light handed and make sure the brush is clean.


E70-Medium Angled Shading Brush:
The brush is shaped in an angle which is great to get into the crease to apply color. I find this brush is too sparse for application of shadow on lids but this brush is great for brow bone highlight.


E60-Large Shading Brush:
This brush is great for apply a wash of color on the lid, this wont give you a crazy concentration of color like the E55. Is great for building up color because it doesn't pick up too much at once. Other than giving a wash of color to your lids this brush can also do a lot more. I like to use the tip of the brush to smudge
shadow on my lower lash line as well as smudge eyeliner out. Sometimes if I don't have a q-tip on hand, I use it to through my lashes to get any clumps out after applying mascara.

E30-Pencil Brush:
This is another must have brush and I would get a second one for back up cause you will fall in love with it. This is taper to such a small point that you can control where the shadow goes on the crease easily.
Contouring your eyes and adding color to your outer corner will be a breeze, you can also use this brush for smudging shadow on your lower lash line. Add Image


E05-Eyeliner Brush:
This is a must have if you are the person that likes using cream or gel liner. This brush can make your love hate relationship with gel liner disappear. Is taper to such a fine point that you can get a precise thin line, or you can build it up to a thicker line. This brush is made with synthetic which means you can also use it for lip color, just make sure you wash it out carefully before using it for liner again.


E65-Small Angled Brush:
This can be use for eyeliner but I prefer using the E05 for eyeliner instead. This brush is a tiny bit too thick for eyeliner but is great for setting your eyeliner with shadow.(Setting your eyeliner with a shadow will pro long the wear of your eyeliner as well as filling in any gaps. This trick will also make your eye lashes look a lot fuller.)


This sum up all of my brushes I will also be doing a Brushes 101 "Care For Brushes" which will conclude my Brushes 101 series. I will also be posting a full review on the Sigma Brush Kit. Remember to visit my Facebook page & "Like", also to comment about any of the post and ask me any questions you may have.
Visit Sigma: http://www.sigmabeauty.com/?Click=1755

Cheri
XoXo

New Facebook Page

Hello all my blog readers thanks for reading my blog, hope you are enjoying it and find it helpful. Thank you once again for leaving comments down below as well as sending messages and face book chatting with me. I like the interaction I have with you all and commenting really helps get that interaction going. I know that Blogger only permit you to comment only if you sign into your Google account. That can be annoying at time, so I have decided to open a face book page where you can comment there instead of here. Is a lot more convenient, since most of you go through my face book status to check on my blog.
This face book page is pretty much my connection to you, you can ask me questions there. Feel free to ask me about anything, I can do my best do give you suggestions. You can also throw a question out there and any of you can respond because you may know something about it that I don't. So please visit my new face book page on Lets Glam Up and "Like" the page. Thank you so much for all your support again.

You can find my page by typing in Lets Glam Up under community or you can click the face book Badge on my blog.

Cheri
xoxo


Saturday, February 5, 2011

Brushes 101-Part 1 "Face Brushes"

If you haven't yet read my "Explanation" post you should read that first to get an overview of what this post is about.
F30-Large Powder Brush:
The name of the brush pretty much just tells it all. This brush is shaped in a dome and is dense. Any thing you have thats close to this brush is great for using it with loose or press powder to set your foundation. Now I don't recommend to use
this brush to apply mineral makeup, is not
quite as dense as a kabuki brush to handle the buffing process. You can also use this brush for bronzer this is actually my
favorite way of using this brush. I don't mean contouring cause this is way too big for that purpose, but to give my face a healthy glow. I take this brush and dip it in the bronzer lightly and sweep the brush on your temple, down your cheeks and your jawline. This should make a 3 shape or E shade on the side of your face. (This is call the 3 or E method for bronzer application)

F50-Duo Fiber Brush:
This brush is also known as a stippling brush or a skunk brush. So if you ever came across these terms you now know what it is and how it looks. This brush is made with 2 different type of hairs, the top is synthetic and the bottom is natural hair. This brush is great with liquid foundation,
because of the flat top design. You have a large area to work with and it cuts down your foundation application time. (Take the tip of the brush and dip it into foundation, now stipple the product on one side of your face. This will evenly
distribute the product than buff the foundation in a circular motion to blend it
out.) You don't have to just use this brush for liquid
foundation is also great for applying cream blushes, highlight color on the cheek bones or to just sweep any fall of eyeshadow under your eyes.

F40-Large Angled Contour Brush:
This brush is made with natural hair some times is made with goat hair. This brush is create for contouring your cheeks because is angled. For those that don't know what contouring is for, is basically to define the shape of your face more. "Is pretty much know as making your face look thinner."(Take a little bit of a matte bronzer and suck in your cheeks, to make a fish face. Now take your brush and sweep it where the hollow of your cheeks are, and sweep it around the jaw line and also the bridge of your nose.) You can also use this brush for blush which is what I like to do (take your favorite blush and dip your brush in, tap off any excess. You want to start with less product and build up the brightness. Smile big and you will see part of your
cheeks pop up slightly, this is the "apple of your cheeks." Sweep your brush on that area and blend out to your hair line, repeat the process to build up the brightness.)

F60 Foundation Brush:
This is a classic foundation brush is made with synthetic hair, taper to a point and is pretty flat. This brush is great with liquid or cream foundation but don't let the name limit you to just foundation. This brush is also great for applying product that contains quite a bit of moisture, like moisturizer and face primer. This brush comes in handy when doing work on client, is not always sanitary to use your fingers to apply primer on your clients. Sometimes if you are out of brushes to use for blush,
you can take this brush and spray a bit of water on this brush. Make sure is not too wet and pick up some product to apply on your cheeks. Tip: when applying foundation with this brush you will experience streak marks, to avoid as much of it as possible. Take your brush and apply the foundation in a criss cross motion, to eliminate as much of the streak marks as possible.

F70 Concealer Brush
This is another brush made with synthetic hair, I like the shape of this brush is small but dense. Which is great for doing spot concealing, I don't specifically like using this brush for concealing under eye circle. I prefer to use my fingers for that, but overall this is a great brush to use for concealing any imperfections.

This is the end of my Brushes 101 Part 1 "Face Brushes" Stay tune for my Part 2 "Eye Brushes"
Visit Sigma for more brushes and accessories
Cheri
xoxo

Brushes 101 "Explanation"

Its been a while since I posted and I have a good reason for that, I have been doing a lot of thinking on rather doing this particular post in video or blog format. I really wanted to do this in video and I actually filmed it. However there were some technical issue, which my camera couldn't pick up enough sound. So now I am forced to do it the blog way, which I don't mind however is going to be divided into a few parts. So I got my bf to do some product photography for me on these brushes. I am featuring my Sigma Complete Kit Brushes with the brush roll in thee upcoming post. If you look at the Sigma website recently you will know they are currently promoting the Make Me Up Collection. The Brushes in the Make Me Up Collection is the exact same as the Complete Kit, however the packaging and numbering is different. I had my brushes for 2 years now and these brushes are under the old number system. However I will be referring the brushes to the new numbering system, to make it easier for those of you who are looking to buy or own the new ones. I am going to give you a full review on the Sigma Brushes in another post under "Review of Sigma Brushes."

So if you are wondering if I am not doing a review in this Brushes 101 blog post than what am I doing.
Well thanks to one of my besti Karin, she reminded me that not everyone knows what each brush is used for and what else it can be used for. So in these two upcoming blog post, I will be pointing out it purpose and tips.

Sigma Makeup Overview:
Sigma is known for their high quality brushes that are comparable to Mac and is extremely affordable. Therefore you don't have to loose quality over value, Sigma do ship internationally so anyone can enjoy these quality brushes. All brushes from Sigma are handmade to perfection under high quality standards. Sigma offers multiple of kits for each consumer to choose from to attend to their specific needs. Customizing your own kit is now available at Sigma to put together brushes for personal or professional uses. Sigma also offer the choice to purchase brushes individually to replace a specific brush in a kit.

Stay tune the Part 1 of Brushes 101 will be up tonight
Cheri xoxo

Wednesday, February 2, 2011

NYX Sales

Your in luck if you want to purchase any NYX Products at a discounted price, because
HauteLook will be hosting a NYX sale on February 3 2011 at 8AM Pacific Time.

HauteLook is an online retail site that runs different type of sales event for 48 hours. Sales events includes various categories such as; fashion, beauty, home decoration, lifestyle products and even getaways.
Urban Decay, Rock & Republic, True Religion and much more brands can be spotted on HauteLook at various time.
The Downside to HauteLook is they do not ship internationally so I am afraid those don't live in North America wont get to take advantage of this event. (If you have a friend that lives in North America, ask if they can do a favor for you :))

What to look forward to on the NYX sale:
-Single Eyeshadow (very high quality and pigmented)
-Palettes (they are great for the value base on how much you get)
-Concealer in a Jar (They are creamy and have good coverage)
-Blushes (cream or powder they are all great)
-Lip Gloss (variety of color and are great to just start your collection off)

If you are interested in this sale check out HauteLook and be sure to get ready because it will go quick.

Cheri
xoxo


Tuesday, February 1, 2011

Face of the Day

Just a short post before my extremely long post on "Brushes" is up. Thought maybe some of you would like to know what I have on my face today.

Face:
-MUF HD Primer in 0
-Skin 79 Triple Function BB Cream in Hot Pink
-Rimmel London Lasting Finish 25hr foundation-200 Soft Beige (half pump)
-Maybelline Liquid Dream Mousse foundation-Sandy Beige in Medium 1 (half pump)
-Sonia Kashuk Hidden Agenda Concealer Palette For Blemishes.
-Maybelline Mineral Power Liquid Concealer in Sand (medium 1) For under eye circles.
-Maybelline Shine Free Loose Powder in Light 01
-NYC Bronzer in Sunny
-NYC Blushable Creme Stick in Plaza pink
-Mac Sheertone Blush in Pinch O Peach
Eyes:
-Urban Decay Eyeshadow Primer Potion in Original
-Coastal Scent 88 ultra shimmer Palette (light yellow,hot pink, light purple, indigo and black)
-Maybelline Expert Eye Studio Cream liner in Eggplant
-Maybelline The Falsies Volume Express in Blackest Black
Lips:
-Revlon Color Burst Lipstick in Blush
-NYC Lip Slider Tinted Lip Balm in Sugar Kiss
Tools:
Eco Tools Foundation Brush
Sigma (SS194/F70) Concealer Brush
Kirkland Large Powder Brush
Sigma (SS239/E55) Shading Brush
Sigma (SS252/E60) Large Shading Brush
Sigma (SS219/E30) Pencil Brush
Sigma (SS209/E05) Eyeliner Brush
Sigma (SS168/F40) Angled Contour Brush

Stay tune for the "Brushes 101" post & a tutorial on this particular look.
Cheri
xoxo